We could often need to create a mixed content carousel (images, text, more). A carousel is in fact similar to a slider displaying more than one slide at once. In this post, we’ll see how to add a carousel to our website, by just adding a CSS class to our Page Builder row element.
This is what we’ll need:
Slick.js
Slick is a lightweight and really useful carousel. It’s obviously responsive and it’s able to adapt to any kind of situation where you’d need a carousel (or a slider!). This is all thanks to a very stable codebase and a well written documentation: we have never had a single issue by using Slick, and we customized it many times according to our (and our clients) needs.
Page Builder di SiteOrigin
Page Builders are fundamental in modern WordPress development. Layout changes, self-editing clients and the great variety of contents you can display nowadays make them usefull, if not mandatory: who wouldn’t like an easy to use, almost zero skill needed interface to edit and post new content?
At Sito.Express we usually use SiteOrigin’s Page Builder because of its intuitive, few-clicks-needed-to-find-stuff interface, flexibility and reliability: not many similar plugins share this same list of qualities, and we’ve got many headaches because of them. Add that SiteOrigin’s Page Builder is incredibly fast compared to others, and there’s really no choice.
Last but not least, it is 100% compatible with Gutenberg and completely free, seamlessly integrating its UI within the SO Layout Block, thus taking great advantages from the Gutenberg’s performance improvements during save action, without hurting the workflow.
During this guide we’ll use the SiteOrigin’s Page Builder as our example, but the code provided it’s not limited to it, as it can be adjusted for any other Page Builder out there with few, if not any, changes.
The concept behind our CSS class carousel
What we want to do is to make a carousel by just adding a CSS class to the container element, being it a row in our page builder UI.
Let’s see an example structure:

In the structure above we have a Page Builder row with six Wysiwyg editors inside (btw, we could add more). We just need one column within our row because Slick.js will provide us columns. Our Editors will be the items within our carousel.
Now, to activate our carousel we’ll need to add a CSS class to the container element (aka our row). How to do this depends from page builder to page builder.
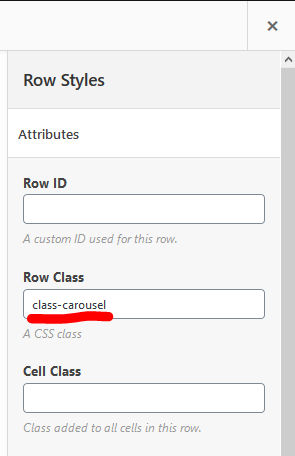
In SiteOrigin’s Page Builder, we just need to click the edit row icon (the small wrench on top right corner): the row property modal will appear.
Within the row edit screen, we can add the additional CSS class we defined in the Row Class input field, below the Row Styles column on the right: see the example image for further reference.
We have choosen .class-carousel but the name is arbitrary: as usual, you can change it according to your needs, however you’ll need to change the corresponding references even in the javascript and css snippets that follow below.
Once we saved our structure, there’s anything to do left here: we’ll continue by just adding the relevant javascript code which we can just copy/paste in our child theme’s script, or enqueue it as a standalone file via functions.php.
We won’t need to handle Gutenberg preview and other annoying stuff, as it’s just a time waste in our opinion. Instead, we’ll continue by commenting the relevant javascript and CSS code we need to make our carousel actually work.
The javascript code of our Carousel
There’s a Gist below with our javascript (which needs jQuery too to work) with some comments added. Just to clarify, here’s a bullet list:
- First, we check if the element we’re looking for (.class-carousel) is actually within our page.
- Then we creat an HTML <link> element that’s responsible for loading the standard slick.js CSS from the free cdnjs CDN
- At this point we load slick.min.js by using jQuery’s getScript method: in this way we’re loading the script only when the carousel is actually there, a thing we couldn’t check so easily otherwise. No need to make a Gutenberg Block, or a SiteOrigin Widget: just add a class!
- We then initialize Slick within the getScript method, with some settings. In our example, we’ve set 3 break points at 1024, 600 and 480 pixels (but they may be too many).
The CSS code of our Carousel
To make the carousel look alike our website UI, we’ll need to add some CSS. One thing you’d want to do for sure is to replace the “prev” and “next” buttons coming with the standard slick CSS.
Since there’s no sense in sharing a highly customized css, here’s an almost blank version you can use as a start: class-carousel.css
We’ve added some icons in place of the prev/next thing (using FontAwesome 4.7.0 – you might want to upgrade or change it) and customized the colors according to our website: you can see our carousel in action here. 🙂